As streaming technology continues to move forward, homeowners are increasingly ditching their satellite television providers for web-based options. A satellite dish can quickly ruin the aesthetics of a home, and removal of the system can be incredibly difficult if the mounting system has penetrated the roofing materials. This is a serious problem that many of our customers are facing in Oklahoma!
Although most satellite dishes are only mounted by a few nuts and bolts, improper removal can lead to water leaks since the required mount typically penetrated into the shingles, ice and water shield, and decking. In this blog, we will look at the components of a satellite dish mount, how to safely remove it to minimize damage, and some signs that you might need the help of a Tulsa roofing company.
DIY Satellite Dish Removal
Before you run to your garage and pull out your toolbox, it is important to determine whether of not removing a satellite dish from your roof is something you actually want to do yourself. If you are patient and willing to learn the process, then you likely could do this on your own; however, this is often a project that most homeowners would rather leave to the professionals.
If you choose to try and take a DIY approach to your satellite dish removal, ensure that you are using a secure ladder and the required tools. It is also important to investigate options for recycling the satellite dish once removed so it doesn’t end up in a landfill. We ALWAYS recommend working with a professional, but we still wanted to give you the information you need to make an informed decision about how to approach the project.
The Components of a Satellite Dish System
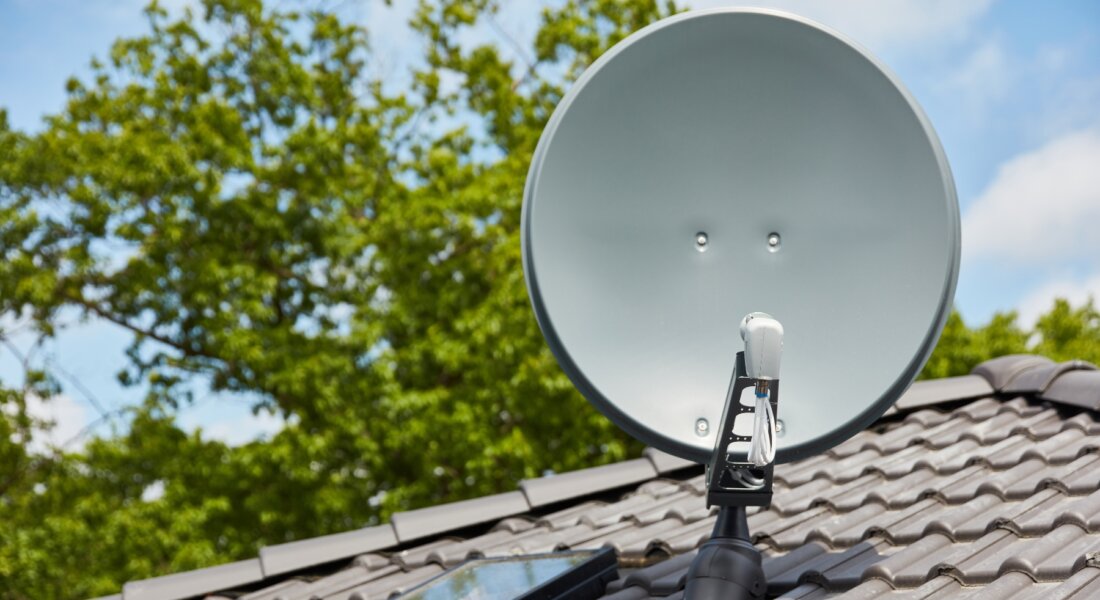
While the satellite dish itself is the most prominent and visible part of the system, you will still need to navigate the wiring system, mounting bracket, and other crucial pieces of technology that are used. To help give you better insight into a satellite dish system, let’s break down the core parts that you will encounter throughout the removal process.
- Satellite Dish – This is the concave, circular piece that collects the signals from the satellite to redirect them to the receiver. When removing this part of the system, take care to handle it gently to avoid damaging the dish itself or the roof.
- Low-Noise Block Downconverter – Also known as an LNB, the Low-Noise Block Downconverter is mounted to the dish arm to convert captured signals into a format that the receiver can understand. Before lifting this component, remove any cables attached to it.
- Wiring System – Each satellite dish includes a wiring system that typically leads from the LNB to a cable splitter that sends individual coaxial cables to the receivers inside of the home. Typically, the splitter will be mounted on the external wall of your home – making it easy to find and unscrew these wires.
- Mounting Hardware – The final component of a satellite dish system is the actual nuts and bolts that attach it all together. If you have a socket wrench and a screwdriver set, you should be able to quickly identify and removes these.
Satellite Dish Removal Tools
Now that you know the components of a satellite dish system, let’s explore some of the tools that you will need to properly remove it from your roof. Aside from the given need for a sturdy ladder that will allow to you safely climb onto the roof and assess your options, there are a few other crucial tools that you need to gather before getting started.
- Cable Cutters – Many satellite dish systems will have multiple cables coming off the LNB. To streamline the process, you will likely want to have a good set of cable cutters. You likely will not be reusing these coaxial cables, so don’t be afraid to sever them.
- Wrench or Screwdriver – Different satellite dish mounting systems use different screws to secure them. Often a socket wrench set or screwdriver will do the trick. Take the time to gather both, if available, before you get started.
- Work Gloves – Some satellite dish mounting components can be worn down over time by storm damage and create sharp edges. Likewise, asphalt shingles can tear up your hands if you don’t have protection. Always have a pair of work gloves handy to protect your hands.
- Roof Sealant – Once the satellite dish is removed, you will be left with punctures from the mounting bracket and screws. For this reason, you will want roofing sealant – often silicone or tar – to prevent leaks and fill the holes.
Satellite Dish Removal Steps
Now that you are ready to get started, take a moment to create an inventory of your tools and reflect on how you can safely do this. If you aren’t confident at this point or are missing any of the required tools, you likely will want to contact a professional for help. If you are ready to get started, here is the sequence you will want to follow:
- Turn Off Power – Most satellite dish cables are connected to a line power inserter to give the coaxial cables DC power. For this reason, you will want to shut off the mains to your home’s power before cutting any wires. Don’t skip this step!
- Disconnect Cabling – With the power shut off, begin disconnecting the cables. Take time to label each of the wires, if possible, to ensure removal is as easy as possible. If you are struggling to manually unscrew the coaxial cables, use your cable cutters.
- Loosen Mount – With the wires removed, you can then identify whether you need a wrench or screwdriver to loosen the mounting bracket. Take your time with this step to minimize damage that could occur in your shingles and roof.
- Unmount the Dish – Once the screws are loosened, the satellite dish should be able to be gently lifted off the bracket. If the dish continues to wobble, you likely need to continue to loosen the screws. Place the removed dish on the ground safely then return to the roof.
- Removing the Footplate – The footplate is what is mounted directly to the roofing system. So, you will want to ensure that you are extra careful during this part of the process. Once the screws are removed, gently lift the footplate while making sure the asphalt shingles are disturbed as little as possible.
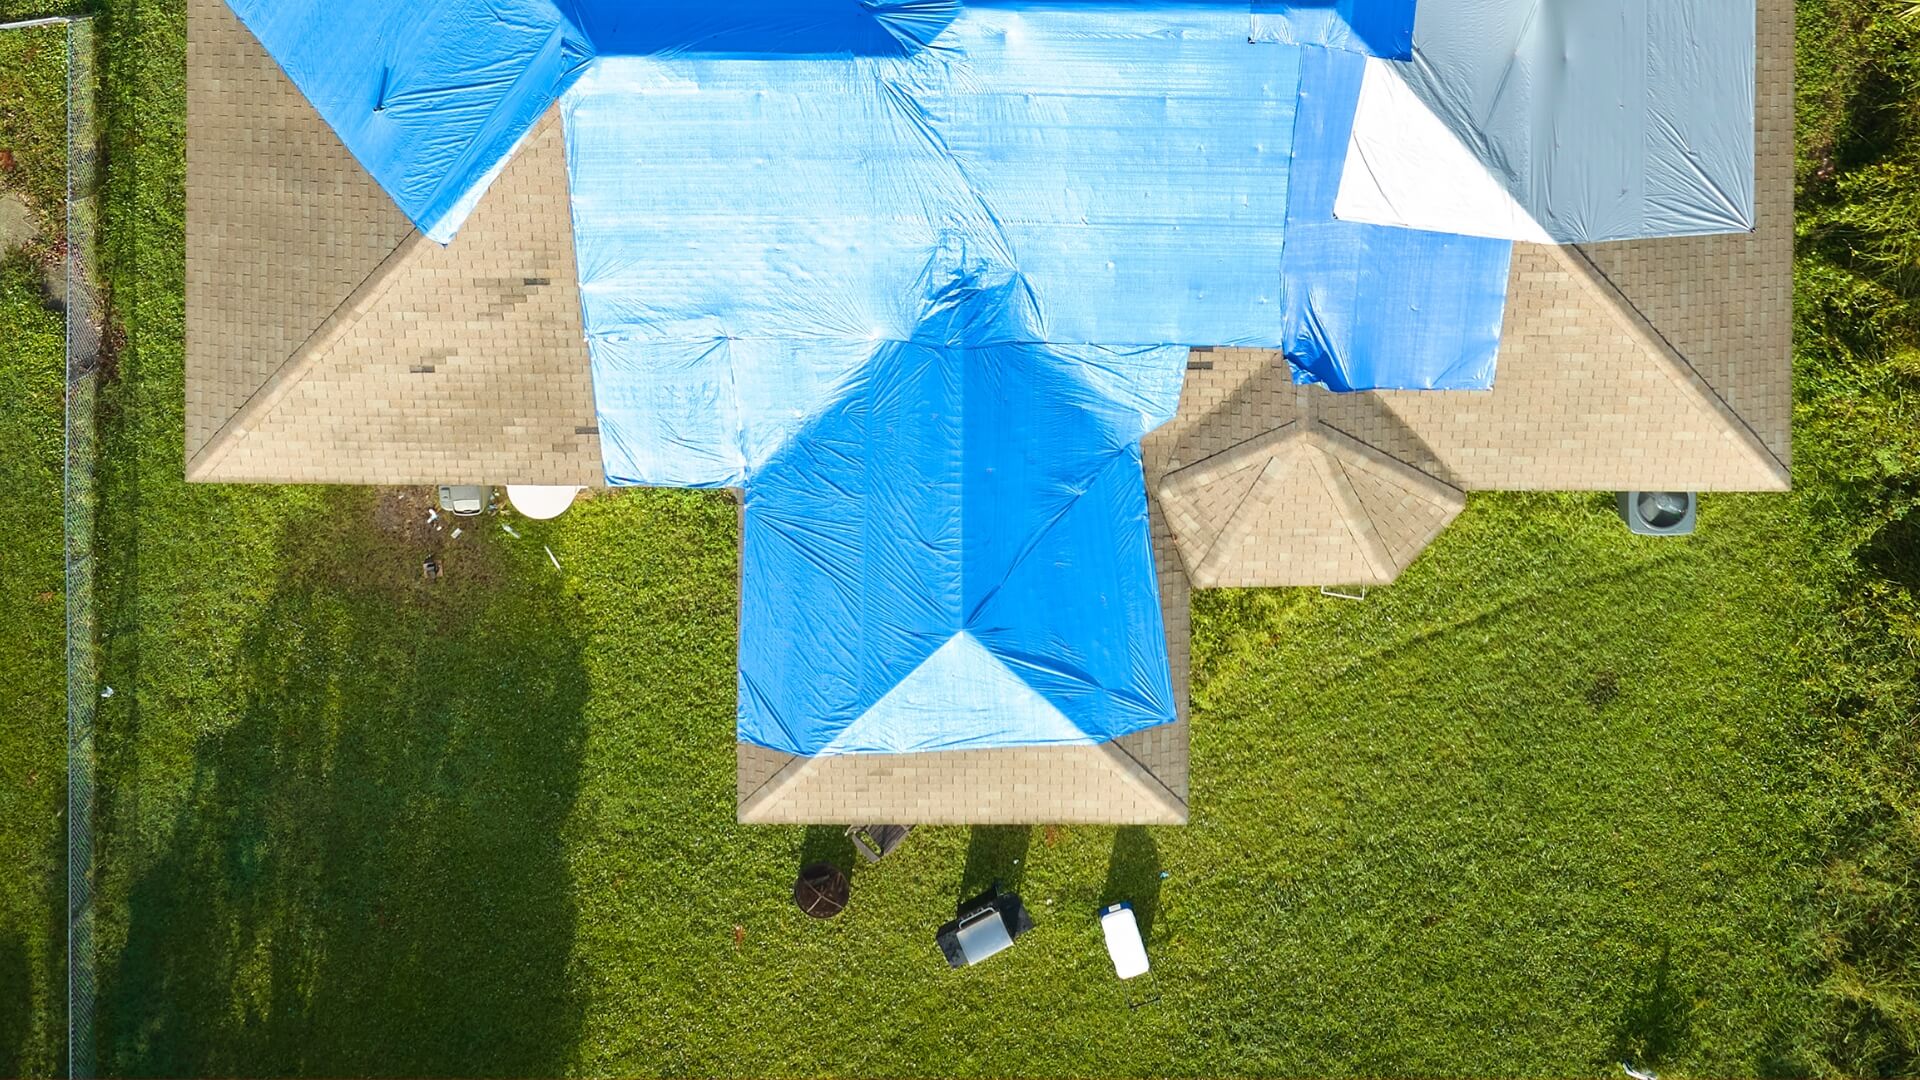
- Inspection and Sealing – After removing the footplate, check the roof for any damage that might have occurred during mounting or removal. If cracks or other issues are found, contact a roof repair company. If damage is minor, use the sealant to prevent leaks. First remove any debris, apply the sealant with a putty knife, and smooth it out.
RainTech Can Handle Your Roof Repairs!
Most satellite dish systems rose to prominence in the mid-90s. In fact, around 10 million subscribers leveraged the technology by 1994! In our experience, many of these homes are actually due for a new roof; however, we will always be available to provide repair services if your satellite dish removal causes damage.
RainTech Roofing has provided expert Tulsa roofing services for over 20 years, and we are ready to help tackle your project too. If you are interested in learning more about our roof replacement or roof repair services, our friendly Customer Success Representatives are just a phone call away.
When you call, you will have the opportunity to book your free inspection to determine if storm damage is present, identify any emerging or pre-existing issues, and learn more about our great roofing system options and financing. We are confident you will be happy with our customer service and attention to detail!
If you notice any damage to your roof after the removal of your satellite dish, please contact us to help address the issues before the next storm comes. This can help eliminate the risk of costly water damage and will ensure that your roofing system is prepared to continue to provide the needed protection for years to come!